Documentation & Help

Valve installation

External valve is fixed to the boat with a fixing ring.

At the first start-up, attach the valve to the screw cap on the boat.

Fix to the boat with the fixing ring. Make sure that the valve sits as in the picture. This should be the final position of the assembly:

Here is later inflated by mouth.

Assembly Instructions

Packrafts are usually inflated without a pump. For this purpose, the attached inflation bag is used. Depending on the size of your packraft, 5-8 air presses are enough to fill your packraft. The steps in detail:

  1. Roll out your packraft flat and unscrew the entire valve (inner, larger screw cap): turn it counterclockwise. 
  2. Screw cap of the inflation bag on the valve. Gently untwist the twisted inflation bag fabric again (without loosening the screw cap).
  3. Fan air into the bag: Either pull up by fast or by holding the bag towards the air pull (if any).
  4. Quickly turn the bag on top (similar to closing a dry bag)
  5. Press air from the bag into the boat. Best by placing the upper body on the bag.
  6. Repeat the process 5-8 times until the boat is fully inflated.
  7. Quickly turn off the inflation bag screw cap (turn counterclockwise)
  8. Immediately re-screw the boat valve. Some air escapes during the process.
  9. Remove  the check valve cap (the outer, smaller screw cap). There is no air leaking to the outside.
  10. Inflate with your own puff until the boat is full. Blow in until it is no longer possible. The packraft should not be filled with more than 1.2 psi pressure. We advise against filling with a pump without a pressure gauge, as it can easily lead to overpressure in the boat, which can cause material damage.
  11. Put the boat into the cold water for 5 minutes: the air in the boat tightens a bit due to the cold of the water, the boat becomes softer again.
  12. Blow up air a few more times
  13. Packraft is ready to go.
  14. Check air pressure during breaks. If the boat is exposed to sun outside of the water, let some air out.
The outer screw cap is opened and the bladder bag is screwed on.
inflation_bag3
In the last step, inflate the boat with a hose. The outer check valve was previously screwed back on. Do not use a pump!

Storage of the Packraft

Store the packraft in a dry place. You should not store the packraft in compressed order: Roll the Packraft in its entire width as a role. Make sure it doesn’t make any kinks. 

Always remove inflatable seat cushions before curling up. The pieces for inflation can otherwise bend and be damaged. Foam rubber backrests can remain in the boat.

Use the packing bag only for travel, not for permanent storage.

Zipp care

Cream the zipps with the attached silicone grease according to the instructions for the TiZip. Treat the zipps of the top in this way. The TiZip is extremely robust. If you are travelling in nature, be sure to keep the zip closed. If you store luggage, close the zip immediately and make sure that no dirt comes to the zip during loading. This is important, because otherwise it can temporarily leak.

If the zipper is dirty, simply clean it with a small brush (e..B. toothbrush).

Do not cream the teeth of the zipper directly with silicone grease, otherwise they will easily absorb dirt. It is sufficient to apply the silcone grease to the outside of the closed zip and at the end points and open and close the zipper several times so that it is distributed.

You can use conventional silicone grease from the trade for lubrication. Please do not lubricate the zipps with oils, even soapy water is not optimal for lubrication, but can be used for cleaning.

Use of the Skeg (the Fin)

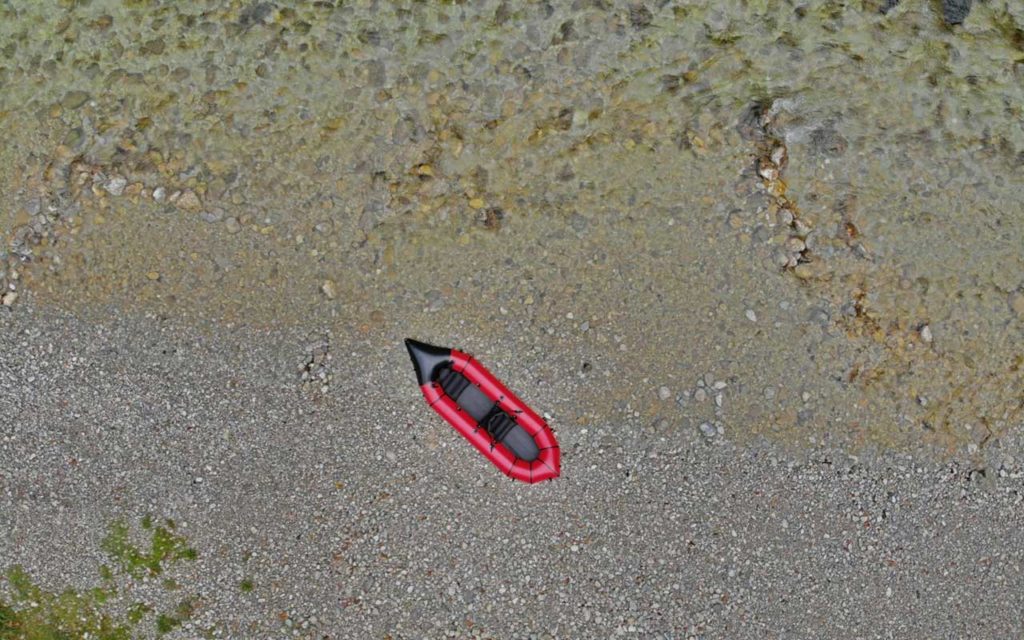
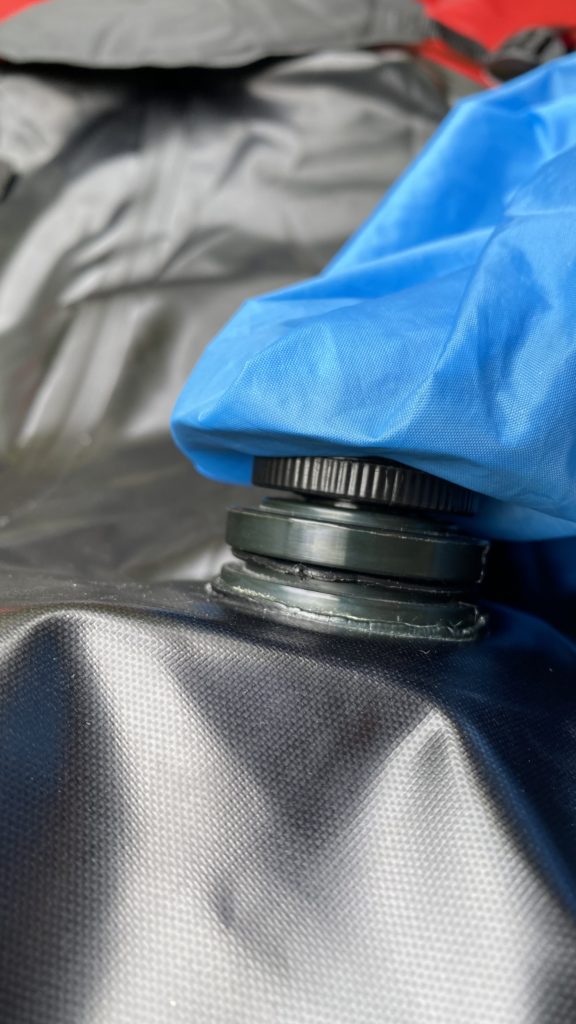
First thread right (front) into the bracket.

The use of the skeg is recommended for standing waters, as it greatly improves the directional stability. It is usually not necessary on rivers. Nevertheless, some paddlers also use the skeg in white water, because this makes the packraft more stable (but also less manoeuvrable). As long as no constant ground contact is to be expected, there is nothing against the use in such situations.

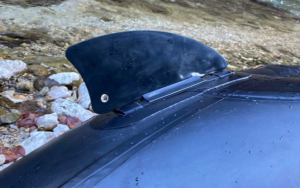
First insert the skeg with its front end (front is the collapsing, flat part) into the front part of the recording, then thread the rear part of the scg (rear is the part with the fuse hole) into the rear part of the recording and slide the skeg all the way to the back. The Skeg is now secured when driving forward, as it cannot slip backwards. However, be careful not to push the boat backwards on the ground, as the Skeg can loosen in the process. In addition, the Skeg can be secured with a string on the fitting.

When landing in a surf, when the boat moves back and forward while swerving on the ground, the skeg is easily lost if it is not secured.

Tip for better directional stability of the packraft

In addition to using a skeg in flat waters, it is very useful to weight your packraft at the front with some luggage. Luggage should therefore always be attached (also) to the bow e.B. in a waterproof bow bag.

Packraft in whitewater

For whitewater rides, it is important that you have good boat contact with your legs. For this you need thigh straps.

Your knees are pressed against the boat tubes by the thigh strap and you are able to tilt the boat with your hip left or right. The round side of the thigh straps points upwards. There are your knees. The Velcro fastener can be closed while riding.

Practice getting out when capsizing extensively in calm water: stretch your legs and swim out of the boat. The velcro fastener opens automatically. You don’t need hands to pull away the thigh straps when capsizing. Do not use the thigh straps in whitewater until you feel safe.

If you are riding a long boat, you should use a footrest so that your feet have optimal contact with the boat.